
A simple wooden board becomes a rolling eye-catcher on your countertop
Not a steady hand? Mask off the squares with painter's tape for crisp, straight lines.
DIY Coffee Board
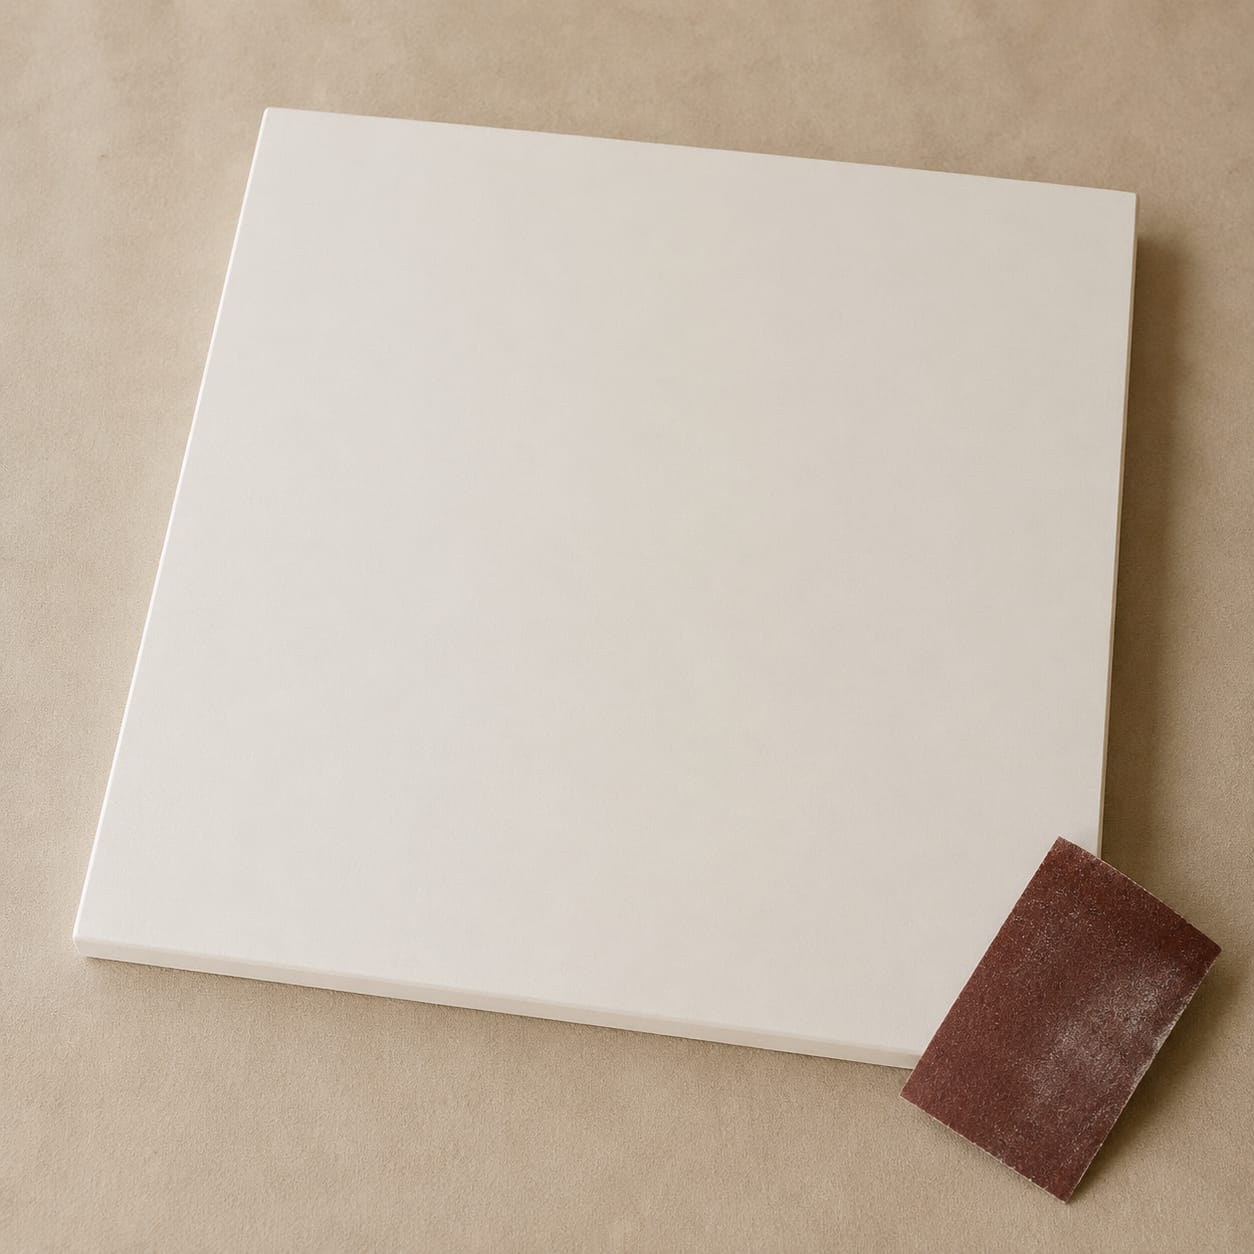
Start by thoroughly degreasing the board, both the top and the bottom. Then lightly sand the top of the board with fine sandpaper (for example P240) so the paint will adhere well later on.
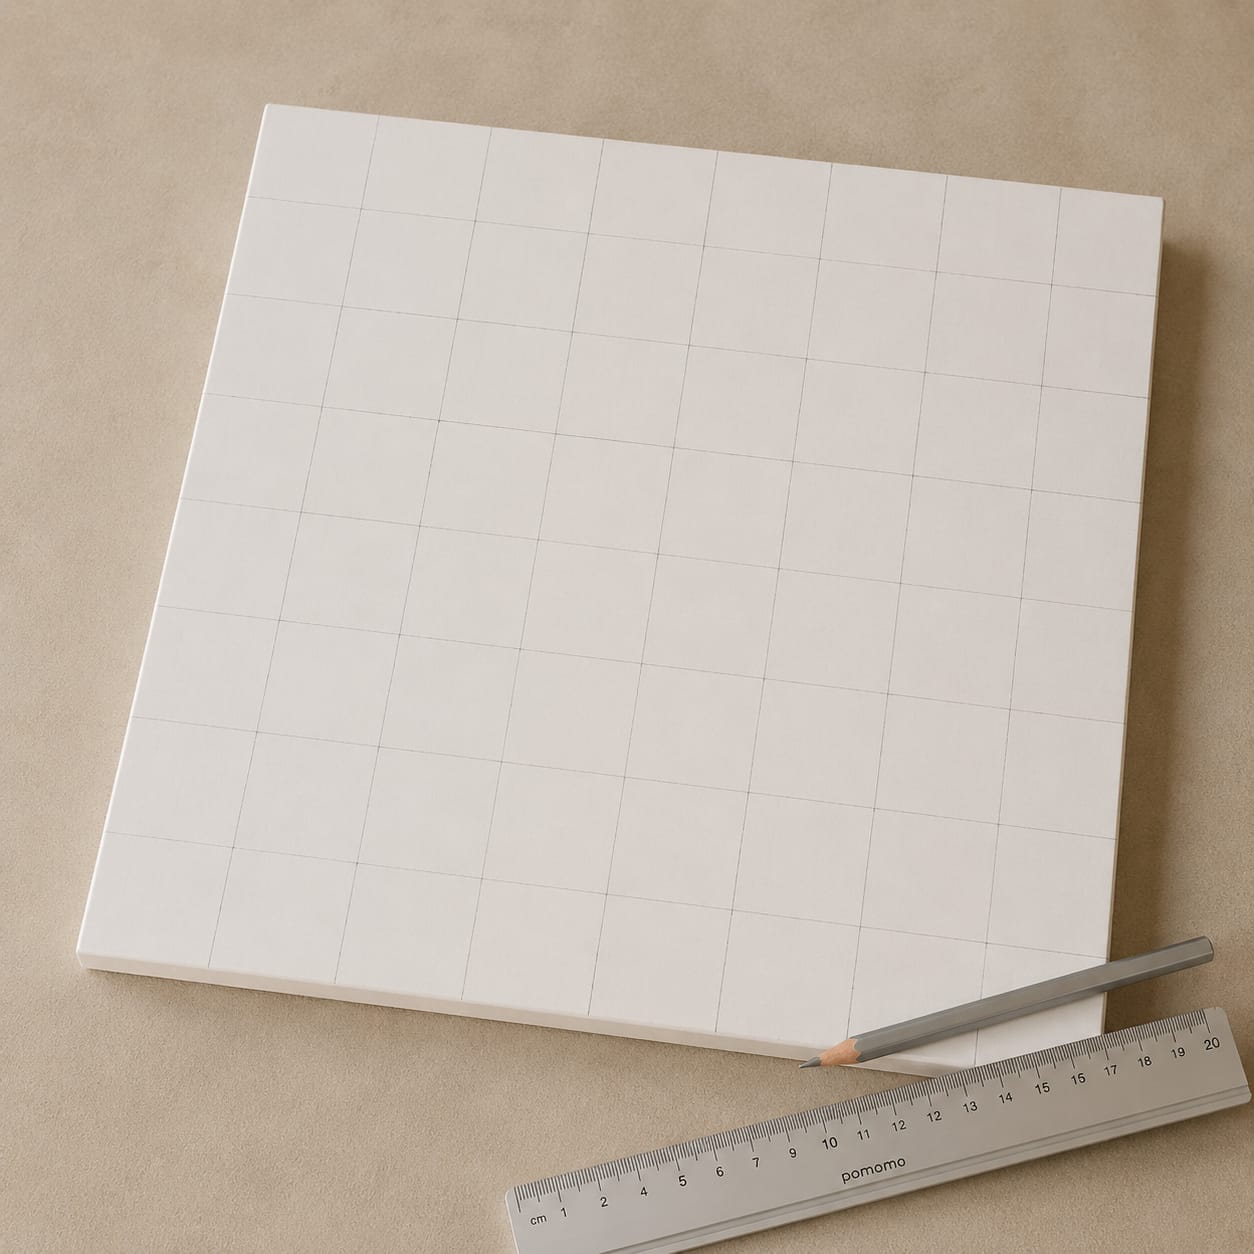
Measure the board carefully and use a grey pencil to draw a grid of equal squares. I went for a size of 5 cm by 5 cm. Use a ruler so all the lines run nice and straight. This grid forms the basis for the checkerboard pattern.
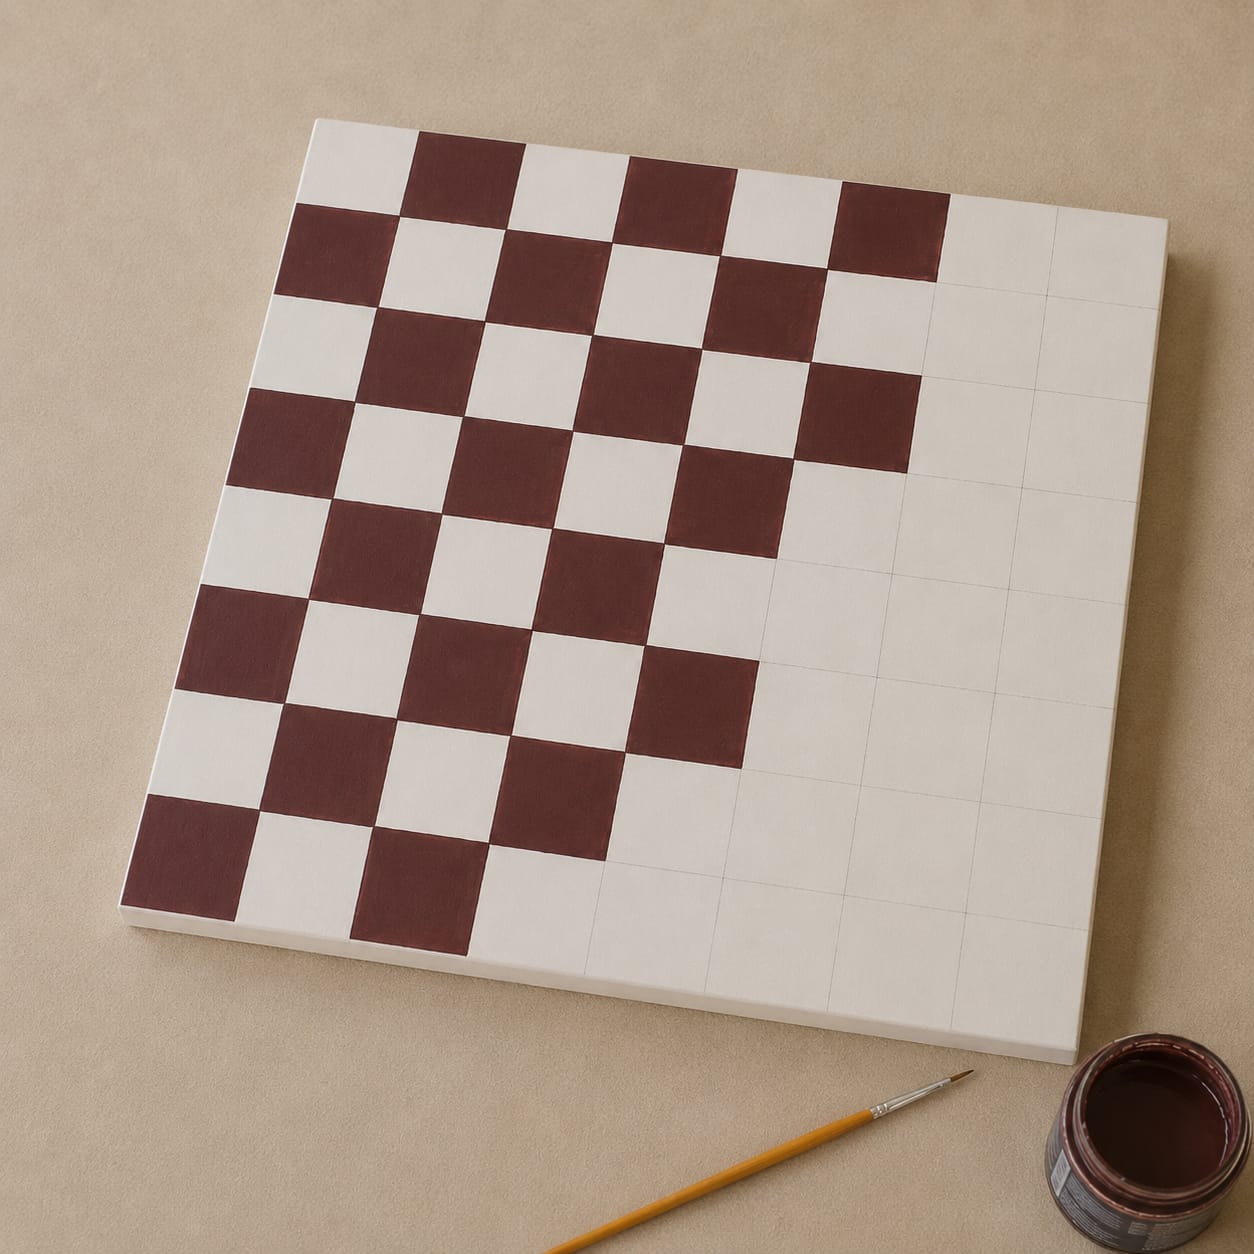
Take a fine brush and paint alternating squares in a warm accent color (I chose 'Full Plum' by Flexa). Work in thin layers for an even result. Leave the unpainted squares white. Don't forget to carry the pattern over onto the sides of the board too.
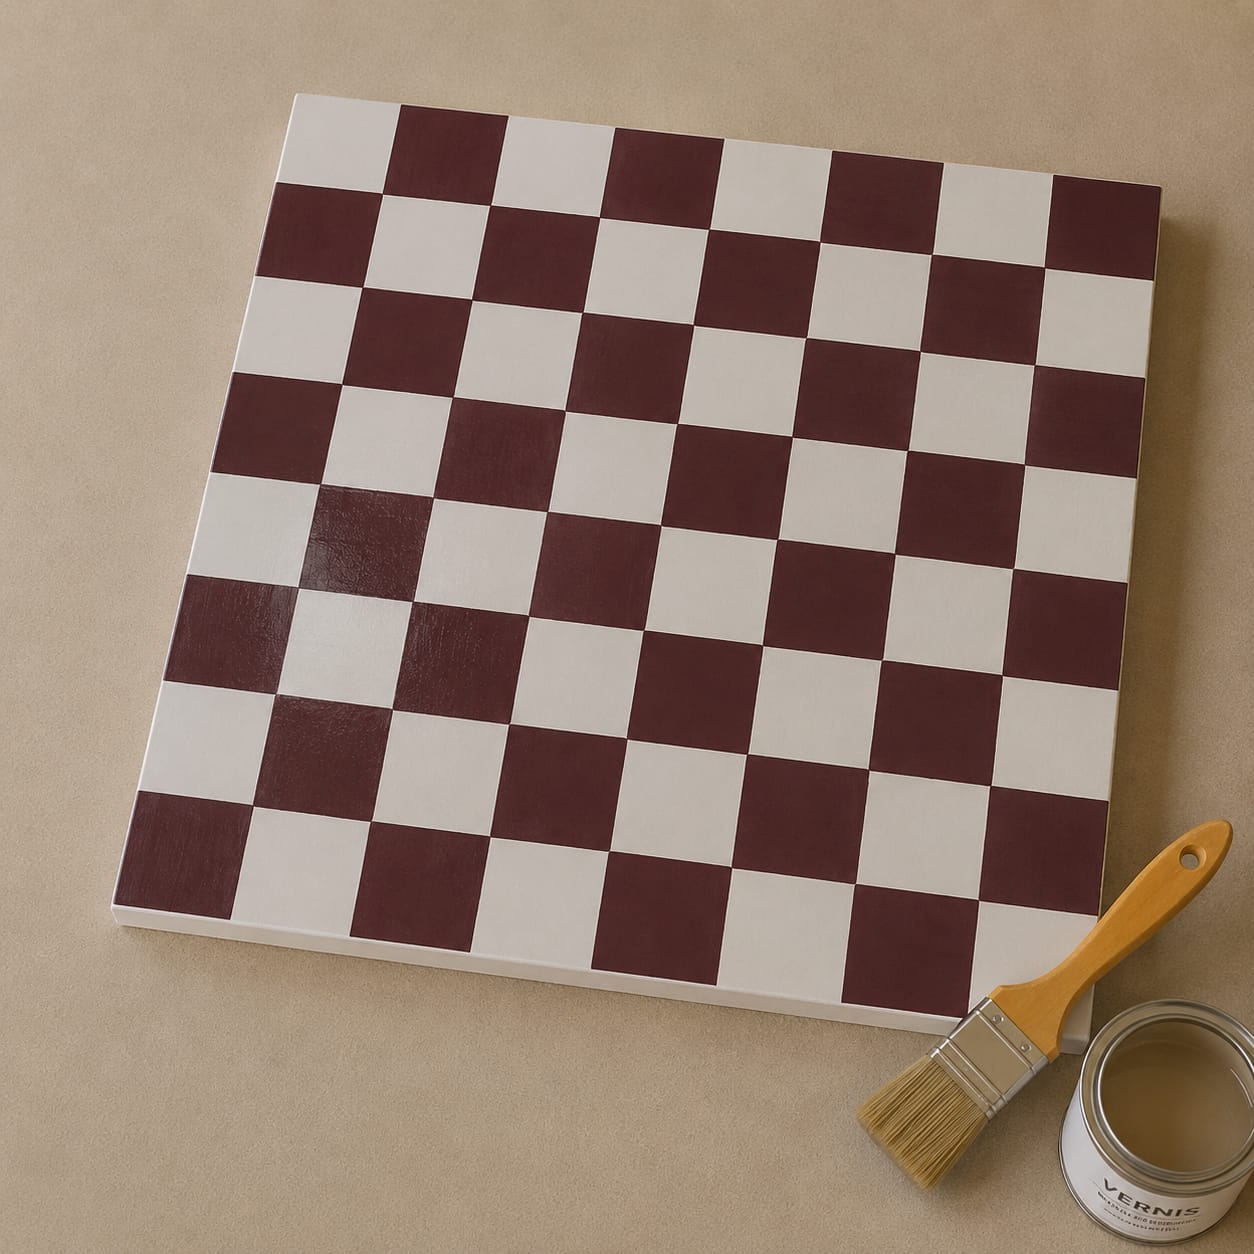
Once all the paint is completely dry, apply one or two coats of clear acrylic varnish over the entire board (top and bottom). This protects the surface against stains and ensures a durable finish. Let each coat dry well before you continue.
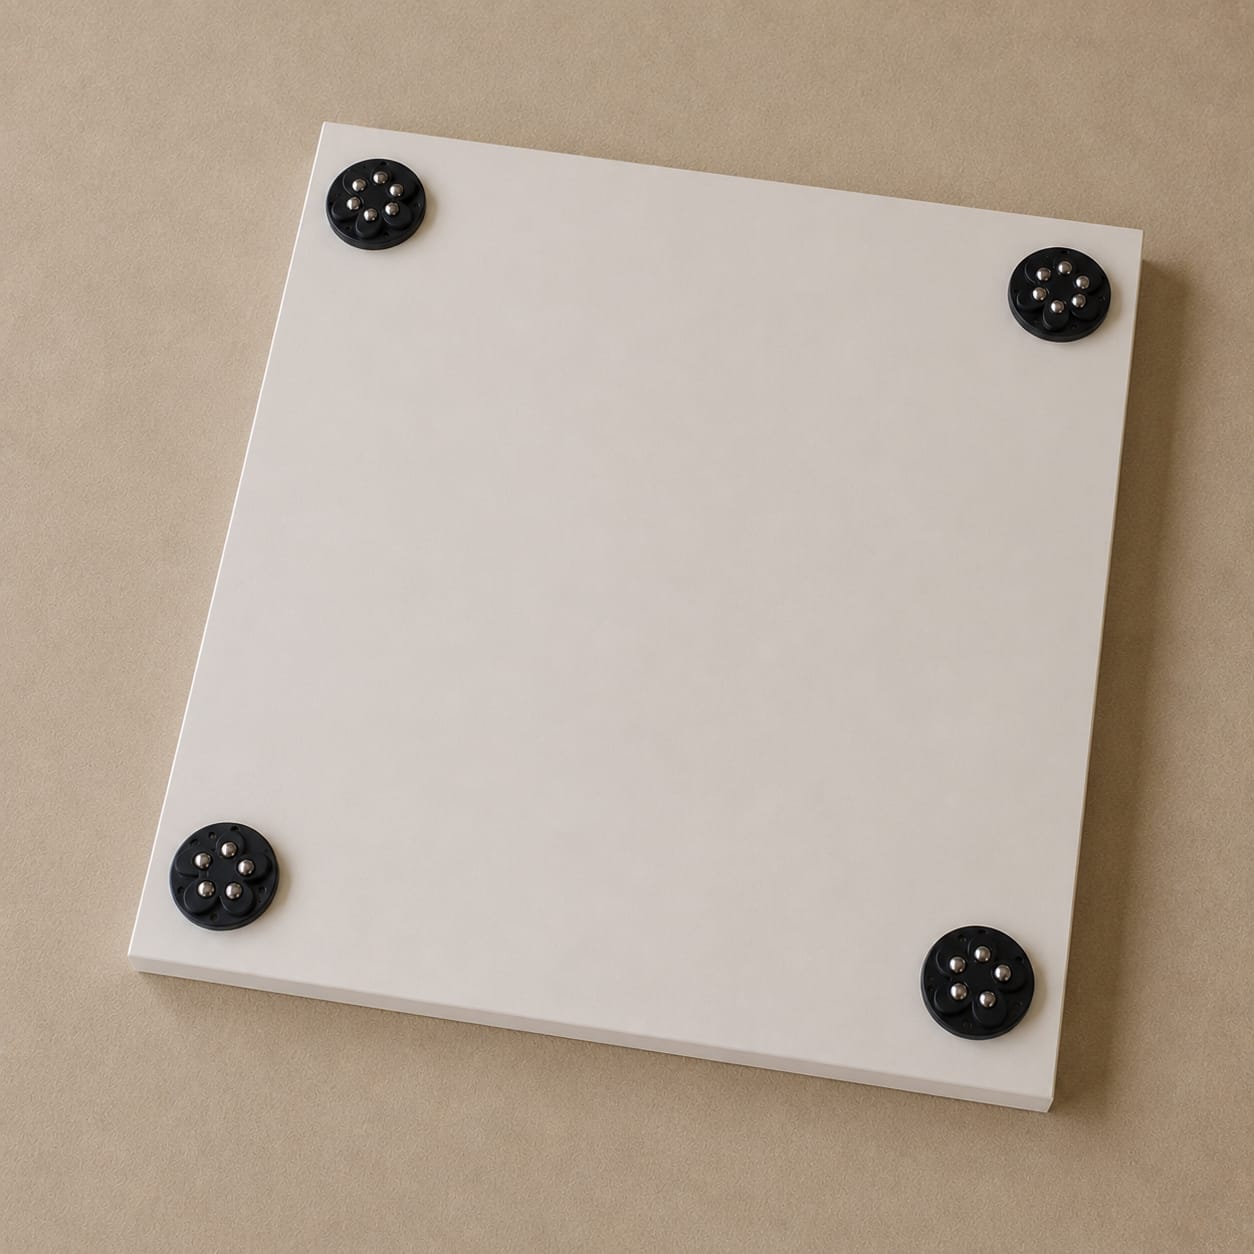
Turn the board over so the bottom faces up. Position the four casters at an equal distance from the edges and attach them to the underside of the board with the double-sided tape provided. Check that all the casters sit straight so the board can roll steadily.
Hi! 🩷 I share my love for colourful interiors, (budget) tips and creative DIYs. With my content I hope to inspire others to turn their house into a lovely, personal place full of atmosphere, warmth and cosiness. Do you enjoy my content or find inspiration in my posts? Then you can support me with a cup of coffee ☕ It helps me create even more interior content, ideas and inspiration!
☕ Buy me a coffee